Integrating VPC Security Groups and Kubernetes Network Policy with TSCE
The network security that Calico provides in EKS is great, however it is primarily focused on the EKS cluster itself. A common use-case for EKS, however, is to build a kubernetes cluster that can interact with other Amazon hosted resources, such as EC2 and RDS instances. The native protection for those resources is the VPC’s Security Group filtering.
The problem with this, however, is that, by default, VPC Security Groups can only be applied to EC2 instances. Therefore, if you wanted to allow some subset of your pods access to an RDS instance, for example, you would have to allow that access from all of your EKS worker nodes, thereby allowing ALL your EKS pods access to that RDS instance. That’s probably not what you want. Luckily, one of the capabilities that TSCE enables is the integration of the VPC Security Group mechanism and Kubernetes/Calico network policy.
Let’s see how that works…
Create an EC2 resource in your VPC
We’re going to create a simple static webserver in your VPC, but not in your EKS cluster to act as a target to demonstrate how pods can become members of a VPC Security Group, and be referenced by VPC Security Group (VSG) policies.
To do this, we need a simple web server in the same VPC as your EKS cluster, but running as a separate EC2 instance, not in the EKS cluster itself. You can do this anyway you like, but if you want some hints, here are some steps you can take to accomplish this.
- Go into your EC2 console and create an EC2 instances
- A t2-micro is more than sufficient
- An Amazon Linux AMI, SSD Volume is easy
- Tag it so you can easily find it later
- Set up a security group for the instance and allow inbound from any on port 80. Call it something like protect-sa-sg
- Create (or use an existing) SSH key
- Launch and then ssh into the instance (either directly or via the console)
- Install you favorite webseerver using the platform’s package tool. As an example in the case of the Amazon Linux, AMI, you might use yum to install httpd and start it: “’ yum update -y yum install httpd -y service httpd start chkconfig httpd on “’
- Install a static file that will be used as the test target: “’ cd /var/www/html echo “Welcome to Setec Astronomy” > index.html “’
Is the website reachable?
Let’s launch a busybox pod in the cluster and do a curl to the IP address of the EC2 instance we just created. So, in the cloud9 shell, do the following:
kubectl run -it test1 --image=busybox -- sh
\ # wget -O - http://<your_ec2_instance_private_IP_here>
You should see your text. Now exit from the busybox container, but note the instructions on how to re-attach to it, we’ll need that later.
\ # exit
Session ended, resume using 'kubectl attach test1-cd46f75fd-fts4r -c test1 -i -t' command when the pod is running
Next, let’s repeat the same again, only this time with test2:
kubectl run -it test2 --image=busybox -- sh
\ # wget -O - http://<your_ec2_instance_private_IP_here>
\ # exit
Session ended, resume using 'kubectl attach test2-766c48655b-hr8zj -c test2 -i -t' command when the pod is running
Tighten up the Security Groups
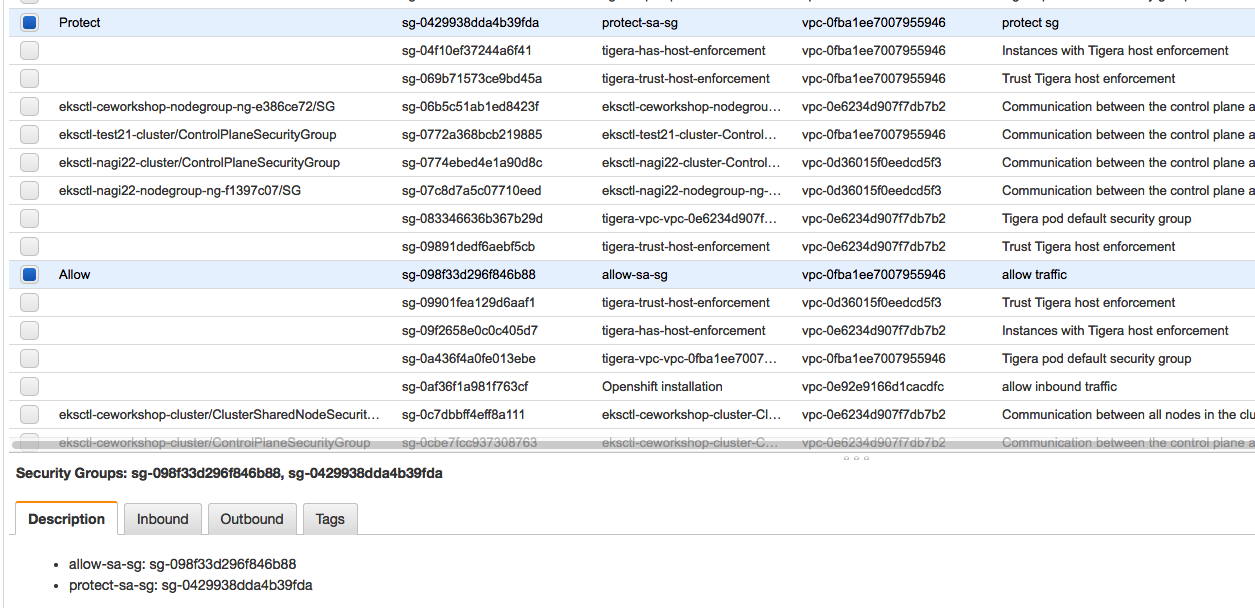
First of all, let’s create a new security group in the VPC, called allow-sa-sg.
Next, change the protect-sa-sg security group to only allow inbound traffic for port 80 from the allow-sa-sg security group members.
Once that is done, get the Security Group identifiers (i.e. sg-xxxxxxxxxxx) for the allow-sa-sg security group. You can do this by listing the VPC’s security groups in the VPC console.
Now annotate the test1 pod with the allow-sa-sg security group.
kubectl annotate pod <test1 pod name> aws.tigera.io/security-groups='["sg-xxxxxx"]'
Lastly, use the instructions provided for connecting back into the test1 and test2 pods and re-run the wget commands.
You should see that test1 can connect to the webserver, but test2 is denied.
We have now protected the VPC resource on a per-pod basis using VPC security groups.